Plastic Container
Industry


Follow this link to read about relevant industry developments
Services
 The experts at Apex Container Tech Inc. are here to assist you in your current business or with starting a new one
Die Ovalization
Most parisons are round to start with, extruded between a die and pin. Many extrusion blow molded containers are oblong. This results in the parison stretching further and thinner into the corners of the container with the foreseeable result that it always the corners and especially at the bottom that can become a problem regarding wall thickness. Most plastics will break at the thinnest corners (the exception being PET) and drop tests are an important criterium for container acceptance. This is even more true when the container has to undergo UN certification and the drop test is performed at -18°C.
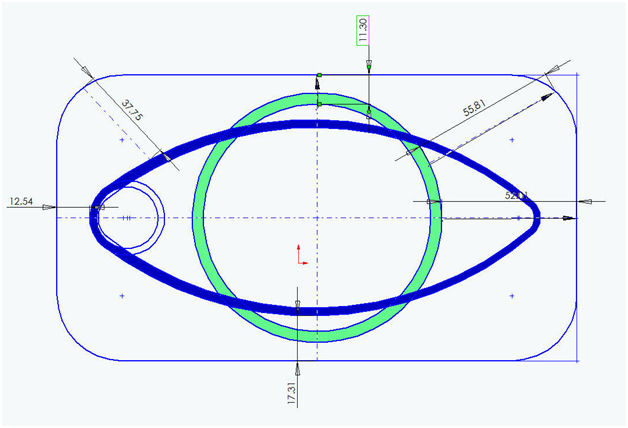
With the help of a spreader bar the round (green) parison can be changed into the more oval-shaped (blue parison). While this helps overall with moving it closer to the container shape, there is still a large difference between the stretch to the corners and to the sides of the container.
The picture below shows a typical situation with the blue parison, the oblong container shape and the green neck off to one side. The parison will have to drape over the neck in order to allow a blow pin to enter. On a shuttle machine a squeeze knife pinches the parison closed during cutting and head air enters it giving it a slightly oval shape. In an industrial machine a moveable blow pin and spreader bar may be used to pull the parison over the neck area and also towards the opposite corner. Both blow pin and spreader bar are moved towards the center while the parison is pushed out. They then move to the opposite corners, dragging the parison with them.
Die Ovalization Part 2
As the parison cannot move at the pinch line the container will have thick areas there whereas the same area but 90° away will be noticeably thinner. This particular issue can only be addressed with a moveable die that can be squeezed/pulled during the extrusion of the parison and will be the subject of another paper. Nevertheless, it is clear from the above that the container would benefit from a parison that is uneven in wall thickness so that the uneven stretch is compensated for. This can be done by ovalizing the head tooling. Most dies for these types of containers are divergent and the most common procedure is to ovalize the dies even though ovalization of the pins would have the same effect. Dies are just easier to work on and can be set straight also more easily compared to pins that are screwed in and therefore have to be marked for each head.
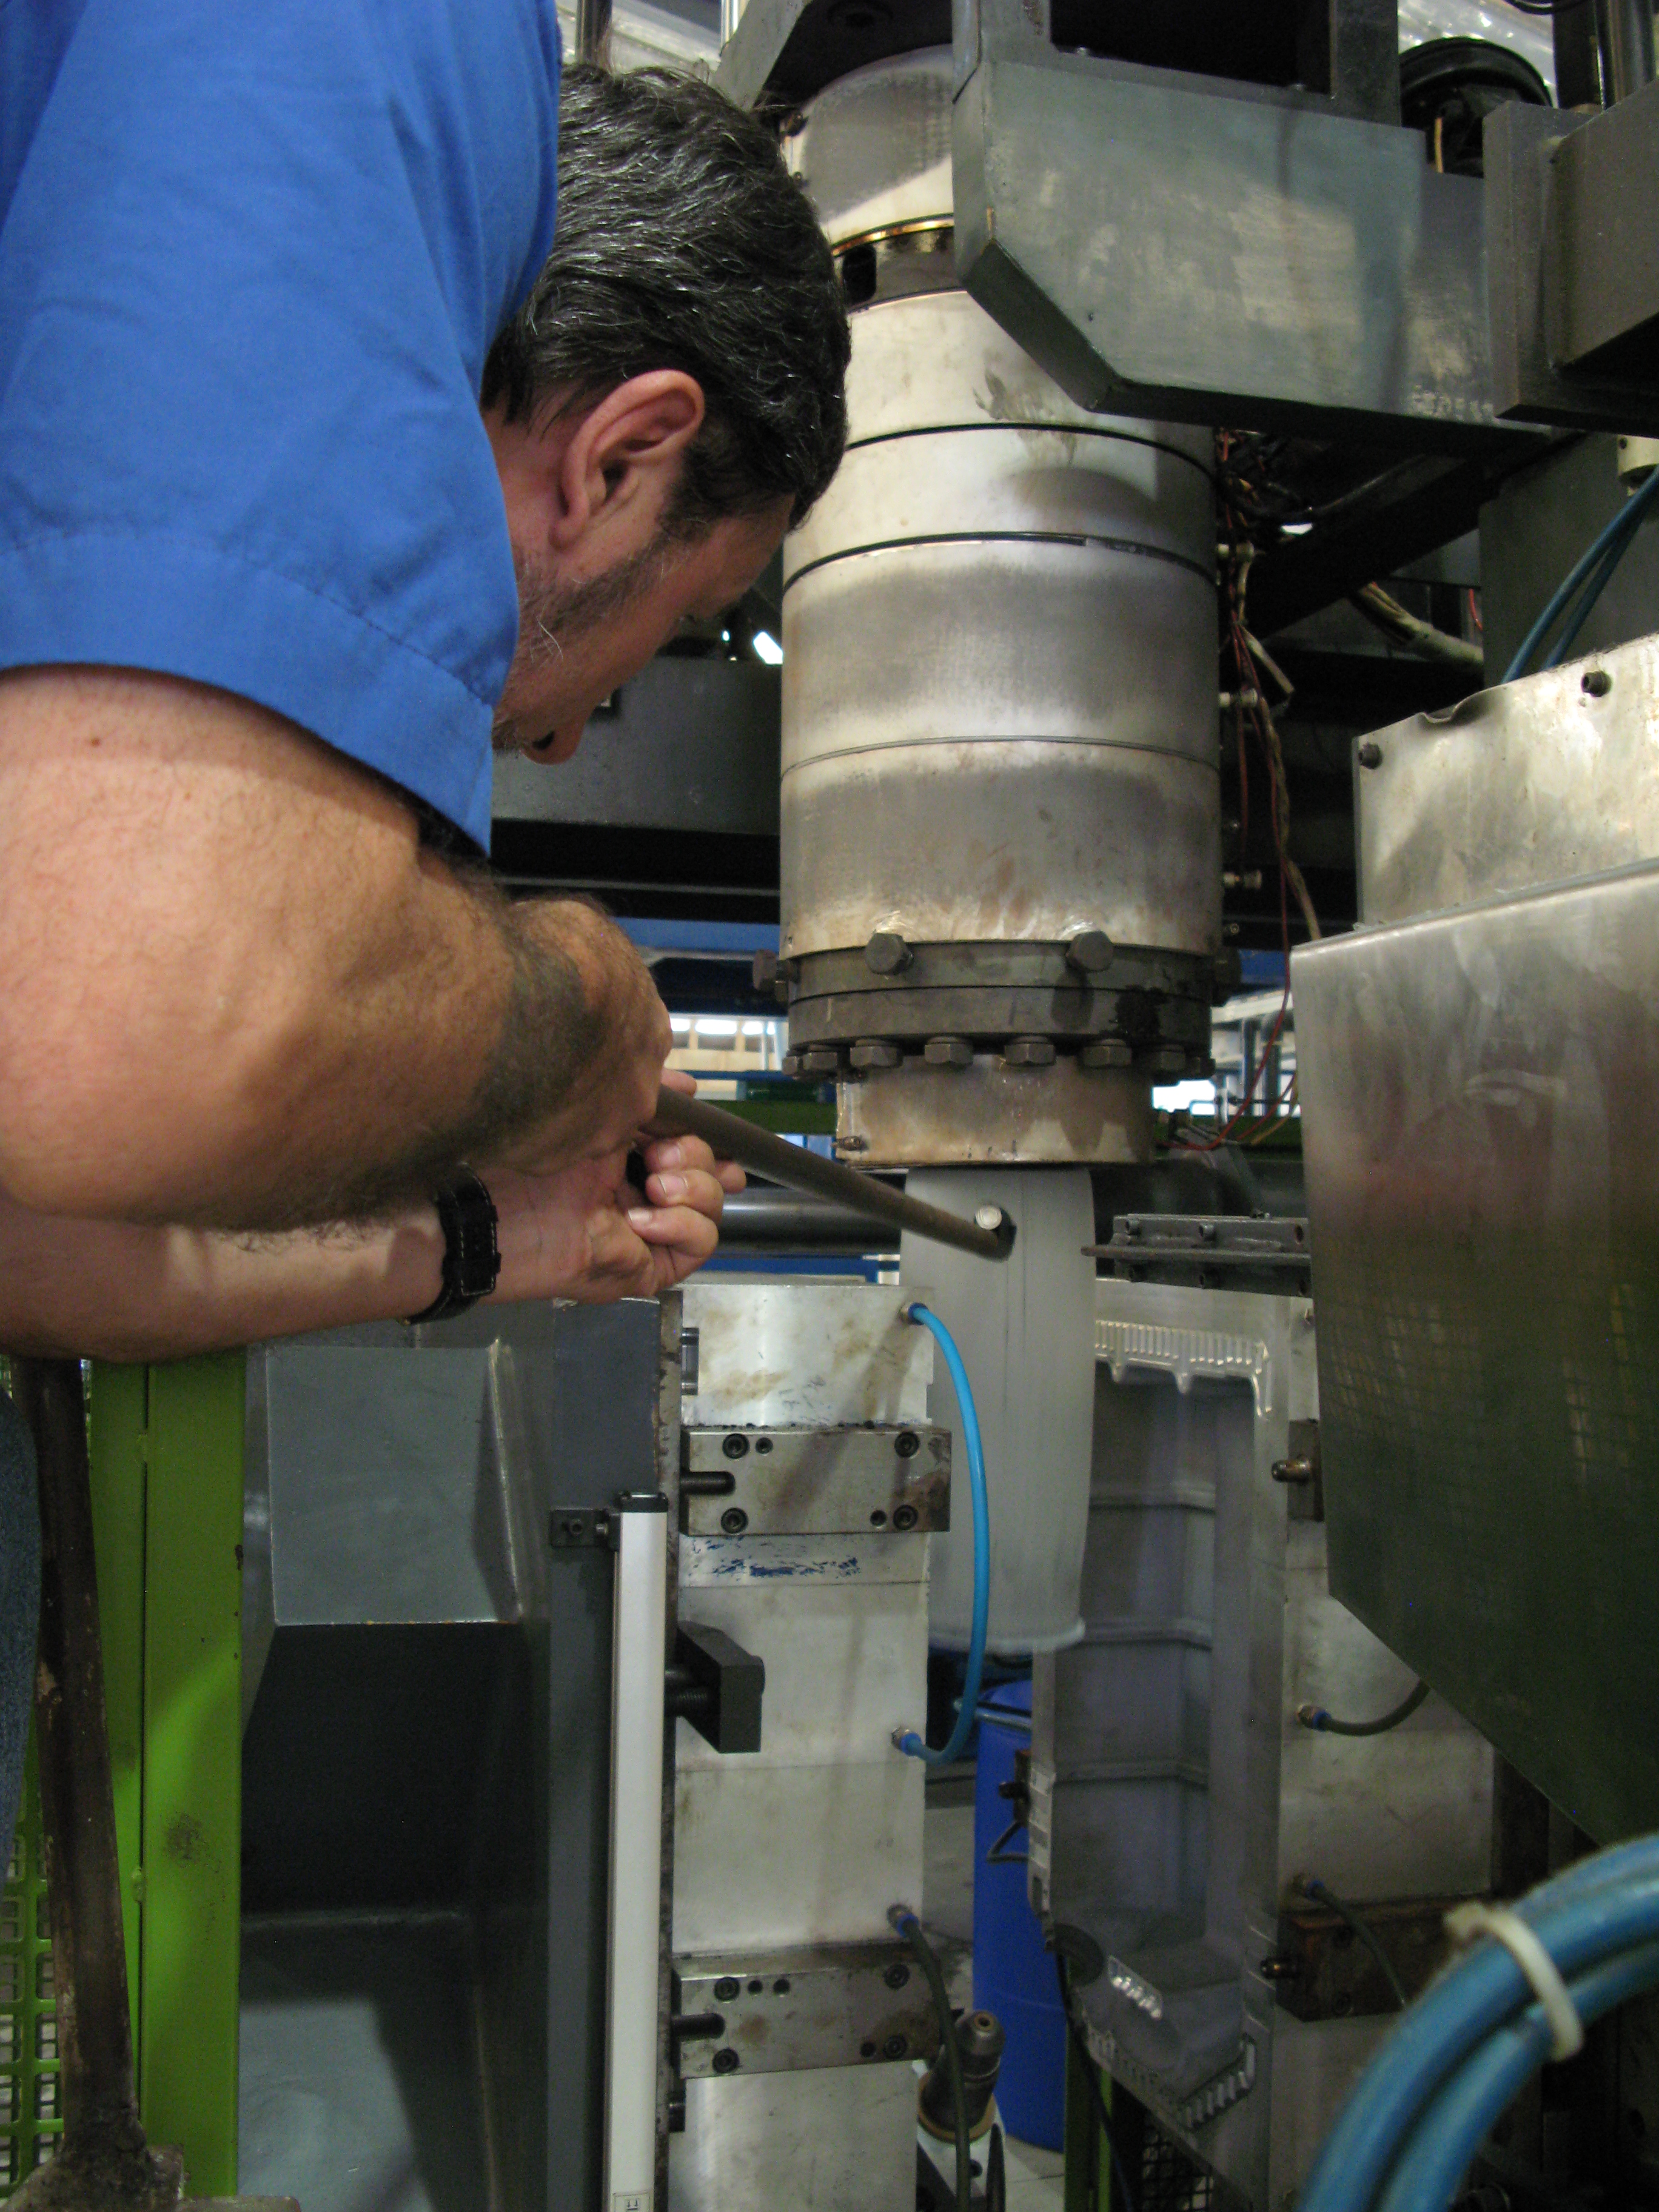
br /> The first step is to mark the position of the die in the head so that it can be put back in the same position. This is best accomplished by drawing a line through the center and stamping the front with a mark that allows the front to back orientation. Next we need to identify which part of the parison flows into the corners we want to thicken. This can be accomplished by taping a wax or magic marker to a broom stick, then selecting an approximate position on the die, marking it first, and finally marking the parison in the selected position as it is being extruded. It may take several trials to get the position right but once achieved it should also be stamped into the die. In a symmetrical die and container configuration the angles of the marked position can be transferred to other corner locations but when spreader bars are involved it is best to make sure that each position is correct.
Die Ovalization Part 3
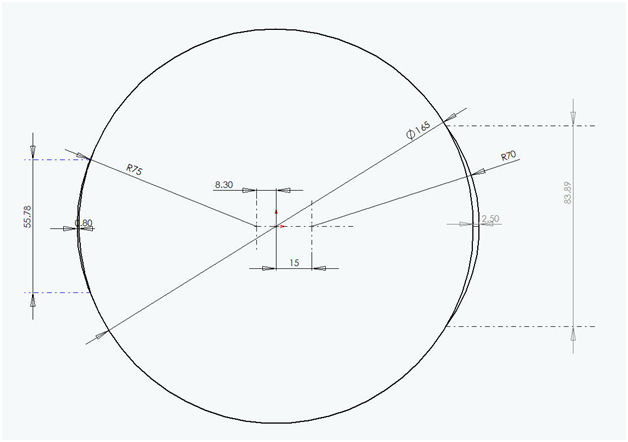
While trigonometry allows calculation of angles and offsets in a lathe, the operator has to decide as to how deep and wide the cut should be and how much of the die land it should use. A 20 oz. oval shampoo bottle may require a cut depth of 0.2 mm (0.008") whereas it may be 2 mm ( 0.080") for a 50 l container. When in doubt, using less is the prudent approach especially with large, expensive dies. As to the width, it depends on the shape of the corner configuration. The cutting angle will determine how far into the land the cut will last. By using the same angle the entire land would be affected. This is usually not done. Instead an angle 2° to 5° different from the land angle is used so that the cut fades out somewhere on the land.
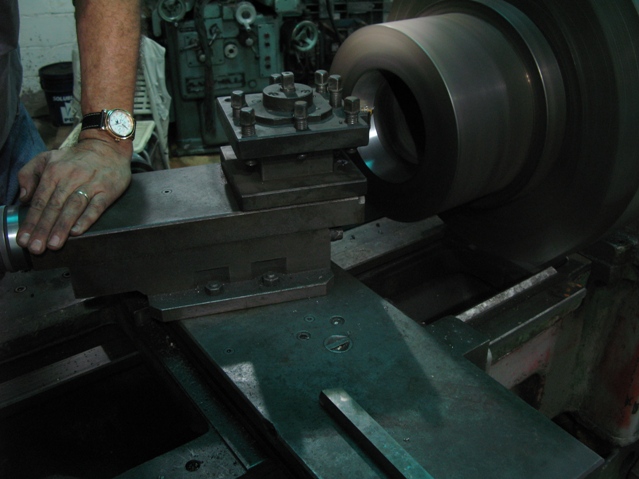
 Once this has all been worked out it is time to mount the die into a lathe. Chucks with 4 jaws make it easier to control the calculated offset but the same can be accomplished by adding shims into one of the jaws of a 3-jawed chuck. Feed will be manual and should be very slow and in small increments as the cutting steel moves in and out of the material to cut. Only experienced lathe operators should undertake die ovalizations; there is considerable risk of injury and damage!
It is not realistic to expect that the first cut will lead to satisfactory results. Most often it takes two and sometimes three tries to get the corners strong enough without causing extrusion problems. IF the die has to be machined in another location and it is a larger diameter one that takes to mount and dismount, the operation may take a whole week. Day one would be marking the parison, day2 first cut, day three first trial, day 4 second cut, day 5 final trial (hopefully!).
Once this has all been worked out it is time to mount the die into a lathe. Chucks with 4 jaws make it easier to control the calculated offset but the same can be accomplished by adding shims into one of the jaws of a 3-jawed chuck. Feed will be manual and should be very slow and in small increments as the cutting steel moves in and out of the material to cut. Only experienced lathe operators should undertake die ovalizations; there is considerable risk of injury and damage!
It is not realistic to expect that the first cut will lead to satisfactory results. Most often it takes two and sometimes three tries to get the corners strong enough without causing extrusion problems. IF the die has to be machined in another location and it is a larger diameter one that takes to mount and dismount, the operation may take a whole week. Day one would be marking the parison, day2 first cut, day three first trial, day 4 second cut, day 5 final trial (hopefully!).

Comprehensive services to develop your package in any blow molding technology
Stretch blow molding is one of the areas our expertise covers. Examine our offerings
Our expert advice in this area has helped many companies improve their bottom line
Injection stretch blow molding is a complicated process that often requires our expert advice